Walkthrough:
How to Invite Team Members
1
Go to Settings
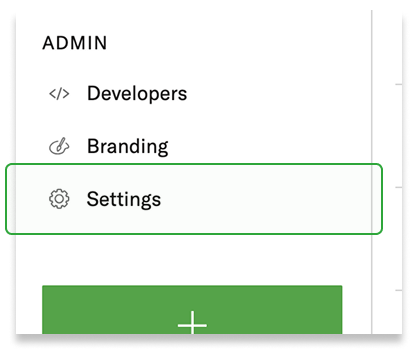
You can access settings in either of two ways:
By clicking on your profile icon in the top-right and clicking “Settings” in the menu options
By clicking “Settings” in the lefthand control panel
2
Invite the Teammate via their Email Address
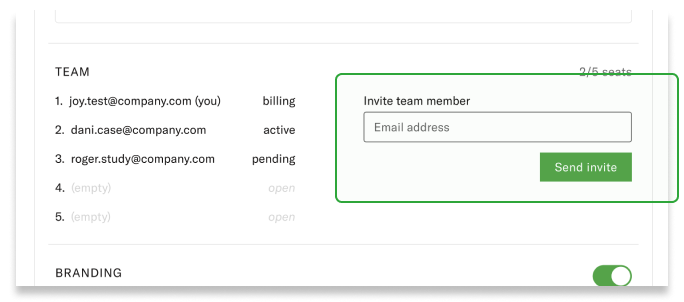
Scroll down past the “Plans” section to “Team.” You’ll see an input field (empty box) where you can type the teammate’s email address and click “Send Invite.”
3
Have the Teammate Accept the Invite

The new teammate will receive an email at the address you provided. The first email they receive will have the subject “[Your name] invites you to join their team.” They can follow the hyperlink at “Join the team” to complete this step.
4
Have the Teammate Verify their Email Address
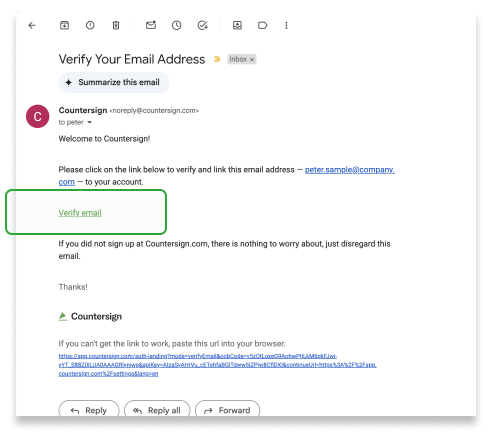
The new teammate will receive a final email with the subject “Verify Your Email Address.” They can follow the hyperlink at “Verify email” to complete this last step.
5
Confirm Everything Looks Good
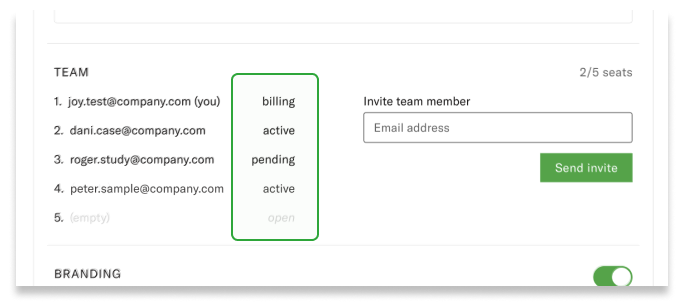
Go back to the “Team” panel in your settings (same as in Step 1) and make sure that your new teammate is listed as “Active.” And you’re good to go!
How to Share a Document
Give Shared Access When You Make a New Document
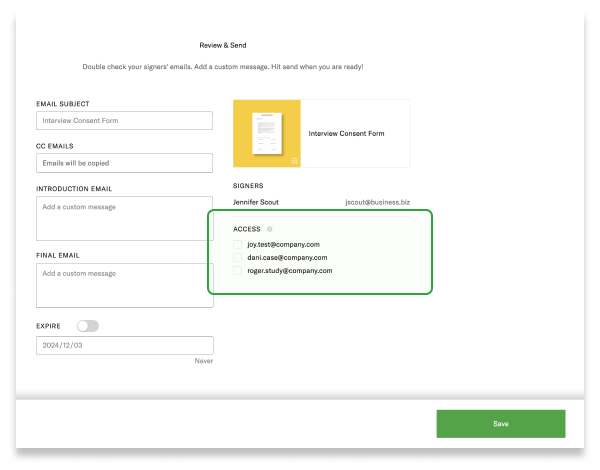
When you create or upload a new document to Countersign, in the final “Review & Sign” you’ll be able to share document access using the righthand checkboxes under the document name and cover sheet. (You can also see and modify the email subject, CC email addresses, and email copy at this stage.)
2
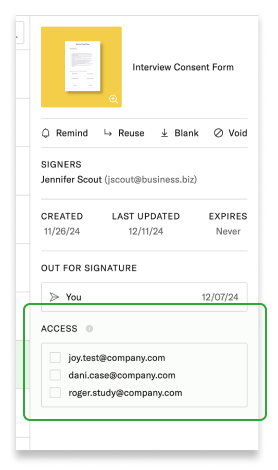
Give Access from the Dashboard
You can also give access to the document to any of your team members by selecting the document in your dashboard and checking the corresponding email address in the righthand control panel.