Step 1: Upload a document
Step 2: Assign template roles
Step 3: Add template fields
Step 4: Fill out email details
1
Upload a document
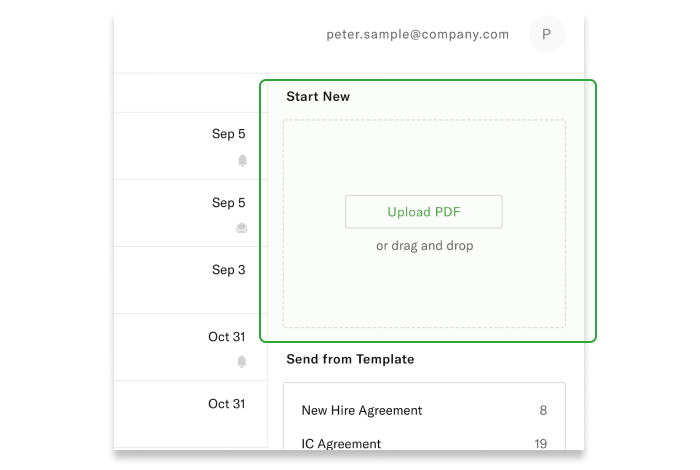
On the dashboard, upload a PDF by selecting the file or simply drag and drop the file onto the Upload panel.

2
Assign template roles
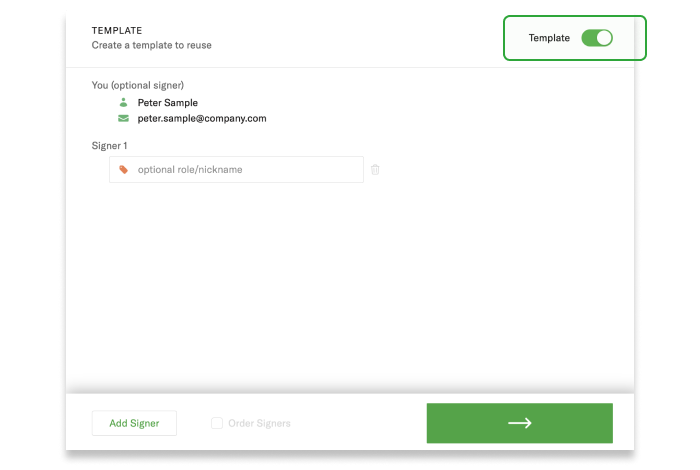
Turn the document into a template by selecting the “Template” switch and assign the roles of the signers. Remember that “You” are a placeholder for whoever is using the template. Assign additional roles depending on how many people will be filling out the document.
Possible scenarios:
- I want to create a template for myself to reuse. All “you” fields are placeholders for my information. All third-party (Signer 1, Signer 2, etc.) fields will remain unassigned until the document is being used for sending.
- I want to create a template for someone else to use. All “you” fields are placeholders for their information. All third-party (Signer 1, Signer 2, etc.) fields will remain unassigned until the document is being used for sending.
When done, click the green arrow button in the bottom-right corner.

3
Add template fields
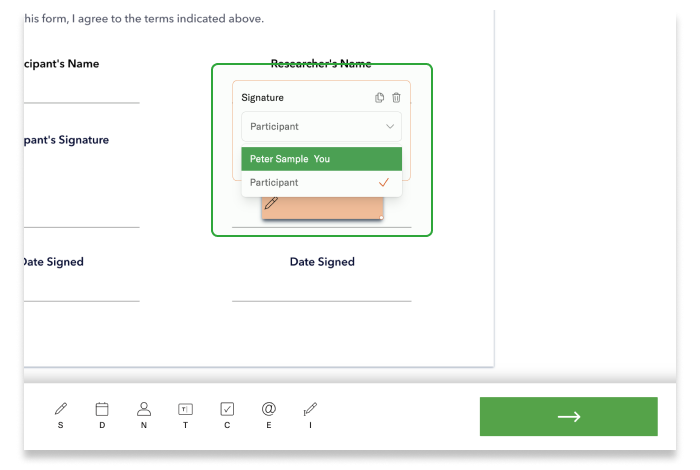
Remember that if you select a field for “yourself” to fill, when you complete the document yourself it will have your information, but if you share the template for someone else to use, the “self” fields will reflect the information of the person who is using the template. When done, click the green arrow button in the bottom-right corner.

4
Fill out email details
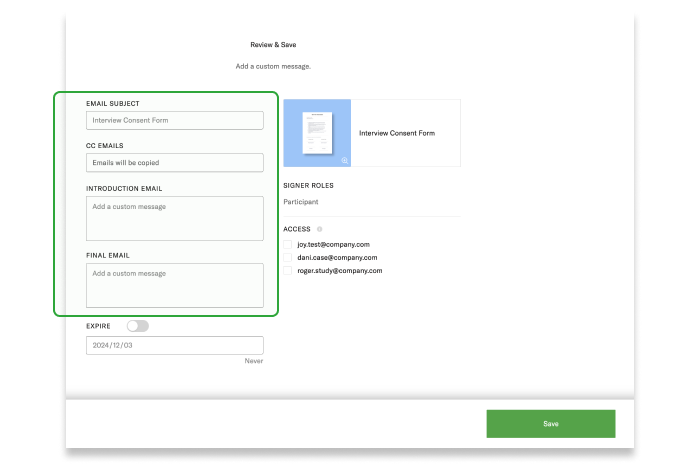
Specify the email subject, add CC email addresses for those who should get a copy of the completed document, and write custom email copy for the intro and final emails. You can also add an expiry date, after which the document will no longer be available for signature and will move to a “voided” status. When done, click the green “Save” button in the bottom-right corner.
